Rain Simulation in WebGL
Video Overview
Abstract
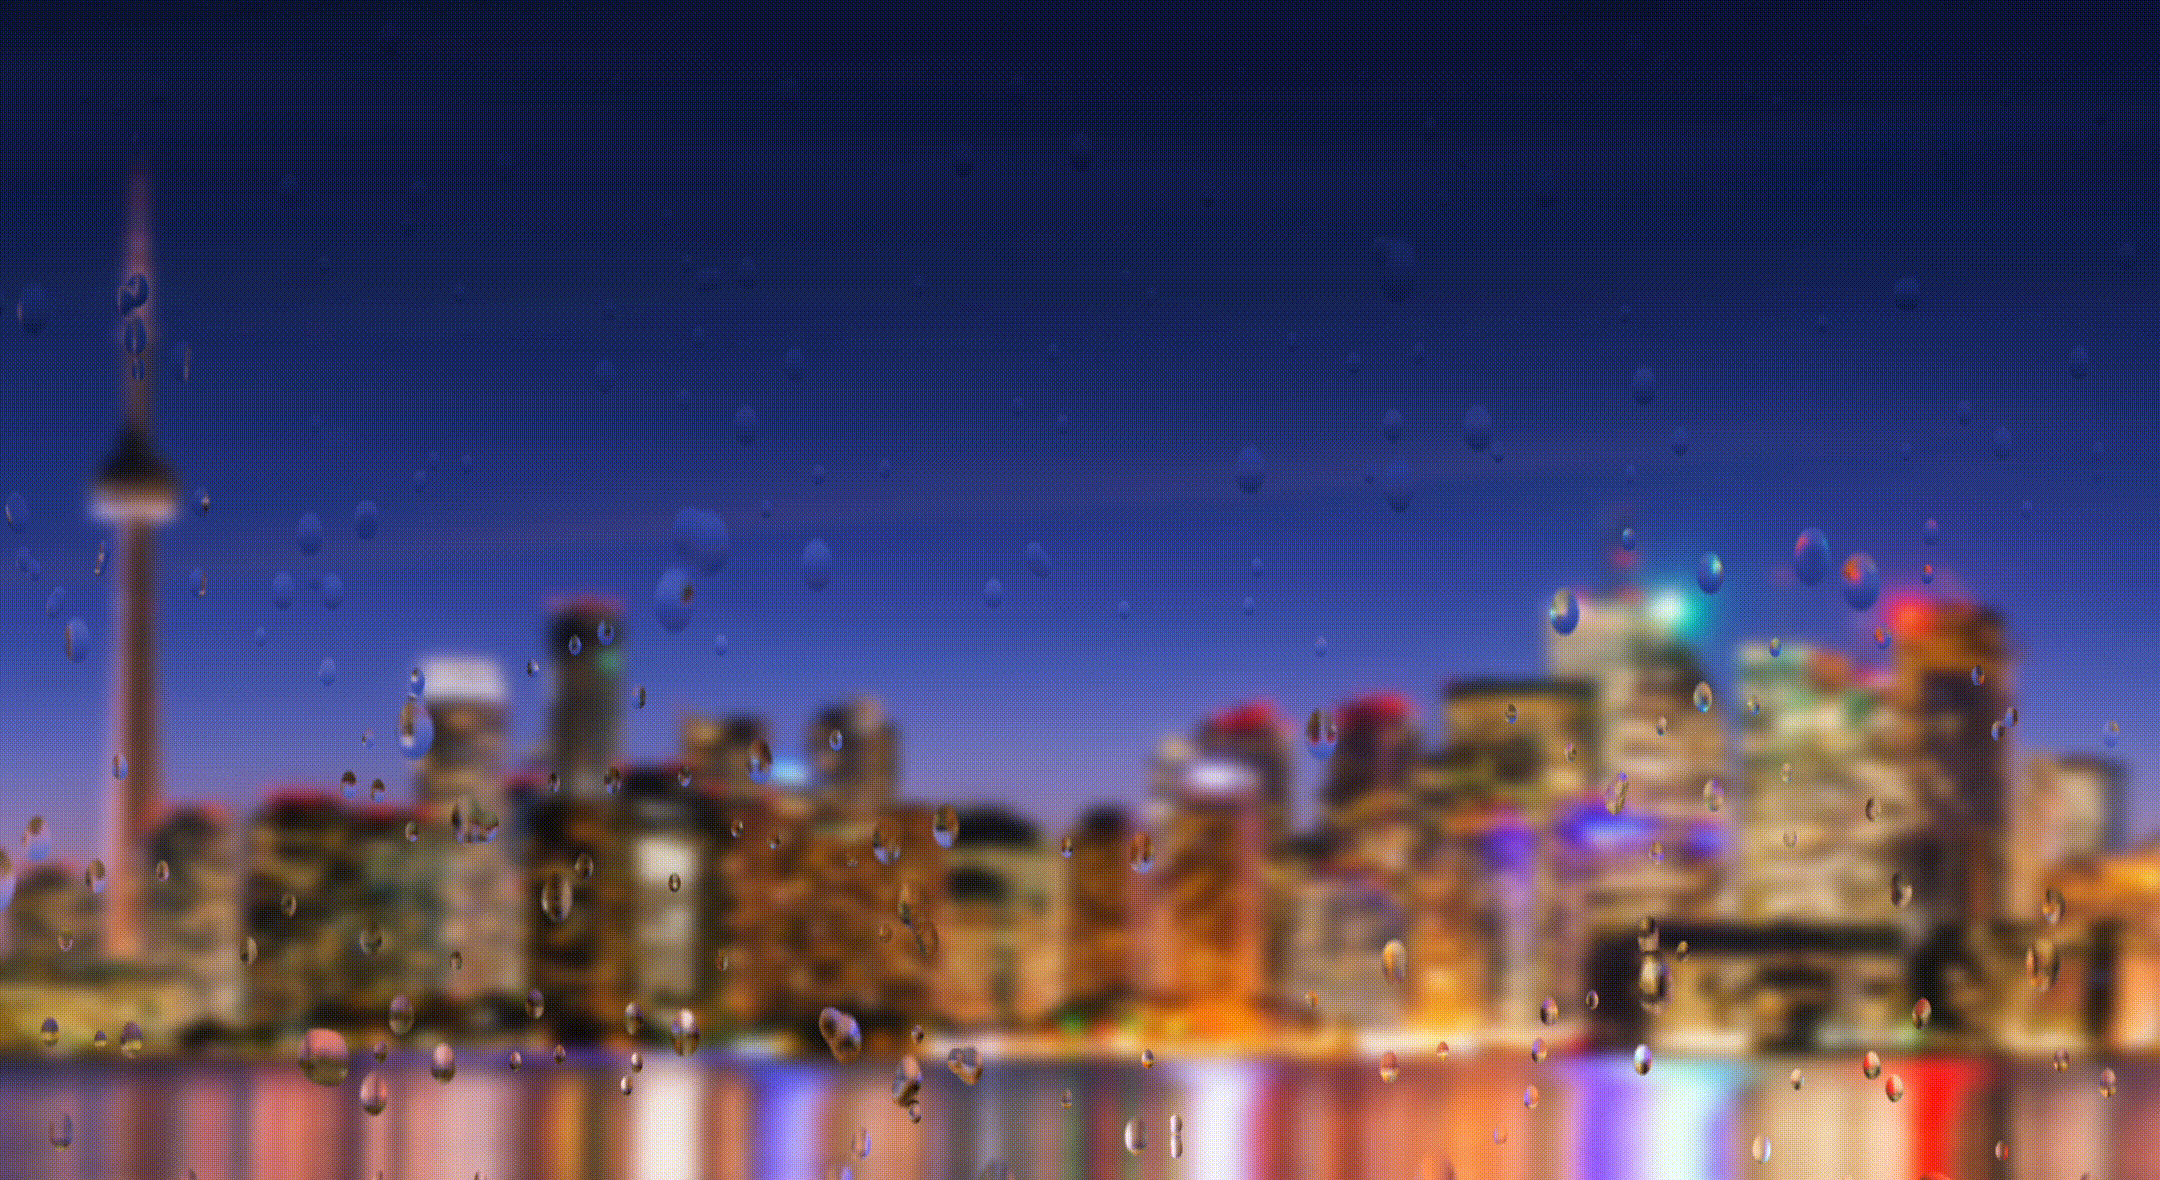
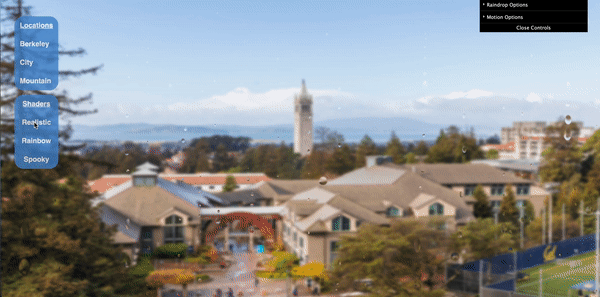
For our project, we implemented a simulation of raindrops sliding on a glass window using WebGL for rendering graphics. The main components of this project were architecting the raindrops themselves, the motion of the raindrops, and the fragment shaders used to simulate the reflection and refraction of raindrops. We also used a physically-inspired hack on the background image, blurring it to give it the appearance of glass for the raindrops to "slide" on. Our simulation responds to user controls and there are two menus to change the background and shaders and a GUI available to manipulate different raindrop architecture and motion parameters.
Our project simulation is available here.
Technical Approach
Raindrop Motion Architecture
When raindrops fall onto a window, they exhibit a few key behaviors. Below, we walk through the seven attributes of a raindrop that we define to characterize the behavior of a drop. Then, we discuss how we simulate the motion of each drop. This approach doesn't explicitly model the viscocity of the water/gravitational forces/etc. - but it does look realistic, and the approach is inspired by these physical properties.
Creating the Drop
- Each drop has some initial size.
- This size has three dimensions, and we can model it with a simplified three-dimensional representation .
- Since all drops in this simulation have the same z-position – since they're all on the same window plane – the parameter corresponds to the "depth" of the drop.
- After visual inspection, we set the lower and upper bounds of the size of a drop to
- Each drop has some initial position.
- The coordinate is chosen by
rand(this.width)
- The coordinate is chosen by
rand(this.height) * 0.95, where0.95is a factor that forces each raindrop to be slightly above the bottom of the view
- Over time, the position varies due to the attributes defined below.
- The coordinate is chosen by
- Each drop has some initial radius. This radius is chosen by
rand(min_radius, max_radius)- Over time, drops shrink as they dry up – and larger drops collide and merge with smaller drops. Both of these physical features affect the radius of each drop.
- Each drop has some initial shrink.
- This aims to model the physical property of "drying up" – smaller drops eventually dry up on a surface.
- Each drop has some initial momentum.
- Intuitively, we'd like larger drops to have larger momentums, so this momentum should be some random component scaled by the drop's radius.
- Through trial and error, we define the initial momentum to be:
0.5 * [(d.r - min_radius) / (max_radius - min_radius)] * rand(2)
- Over time, the momentum should vary based on randomness (how likely a drop is to "slip" down) as well as due to collisions with other drops.
- The default momentum variable,
momentum, refers to the momentum along the main axis (y-axis). We also define amomentumXvariable that models the change in x position due to collisions and other randomness (intuitively, drops rarely fall in a perfectly straight line).
- Each drop has some initial spread.
- The spread of a drop is a physically-inspired property that characterizes how much the drop spreads out on the surface when it comes into contact with it.
- We model this as two-dimensional spread (different spread for and coordinates). We assign an initial spread value of
1.0to each axis.
- Over time, the spread should decrease (it originates from the initial impact, so this makes sense intuitively).
- When a large raindrop slides down a plane, it may spawn other child raindrops as it breaks up due to surface friction.
- This doesn't happen at every time step, so we need some variable to track when to spawn new raindrops.
Simulating the Motion of Each Drop
Our application maintains a drops array, which has a list of all current Drop objects on the screen at any particular point in time. The animation loop calls the updateDrops method.
In updateDrops, we first add a raindrop if the number of raindrops on screen hasn't exceeded the maximum capacity.
Then, we apply the following logic to each drop.
- Simulate the independent movement of each raindrop by modifying the raindrop's
momentumattribute.- Let
norm_dropbe the normalized drop size between(0, 1).
- Each raindrop has some probability, , of sliding down screen at any particular time step. Intuitively, we want this probability to correspond to the drop's size, so we define it as follows:
chance(0, 0.5 * norm_drop)
- If the drop should fall, then we update the momentum based on another random variable that's also dependent on the size of the drop:
drop.momentum += random(norm_drop)
- Let
- Simulate the shrinking of drops due to them "drying up."
- Intuitively, not all drops will shrink at the same rate, so we apply some randomness here.
- We increase the
drop.shrinkattribute by0.01with a probability of0.05.
- Then, we reduce the radius by the current
drop.shrinkvalue.
- As such, the drop shrinks faster over time, since the
drop.shrinkvalue increases up over time.
- Simulate the spread of each drop.
- Over time, the spread decreases, so we reduce
drop.spreadXanddrop.spreadYby a constant value (0.9and0.4, respectively).💭This is inspired by this Wikipedia article describing drop impact - it identifies two possible behaviors (spreading and splashing) - for simplicity, we only implement spreading. This effectively assumes that a drop hits the glass at a velocity below the critical threshold for splashing/scattering.
- Over time, the spread decreases, so we reduce
- Add new child drops in the path of this drop if necessary.
- Drops are spawned at a rate dependent on the size of the drop and the current momentum.
- When a child drop is created, its size is smaller than the parent drop and its position is slightly above the parent drop
- If the drop moved, then update the drop's position.
- If the drop went off screen, then remove it from the array.
- Check for a collision with another drop:
- Apply the distance formula to calculate the relative distance between the two drops.
- If a collision occurred, calculate a new radius based on the combined area of both drops.
- Update the original drop's radius, momentum, and spread. Also, update the momentum in the x-axis here (realistically, when a drop collides, it may not fall in a straight line.
- Simulate friction by applying an upwards force to each drop.
- Intuitively, drops won't slide smoothly down screen.
- Effectively, we slow down each drop's momentum by a factor that's dependent on the current momentum and drop radius.
- Redraw each drop to the screen.
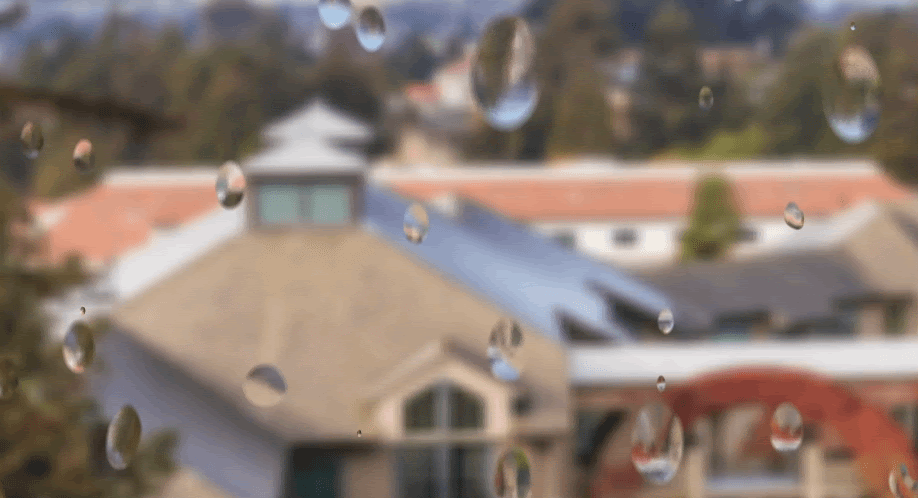
Rendering Each Raindrop (Drop Alpha)
We use the approach here in order to render each raindrop.
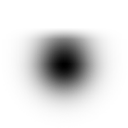
In order to shape our droplets, we utilize a css feature that allows us to "layer" the drop_alpha image over each of our raindrop canvases. In effect, this layering will only show the parts of the canvas that are encompassed in the black portion of the alpha image. Since the image is blurred around the edge, that makes for natural and realistic-looking raindrops!
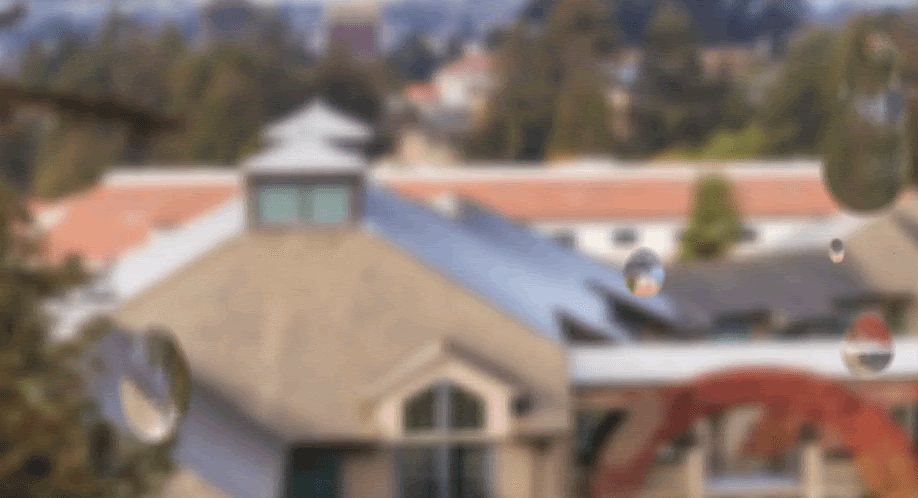
Incorporating Reflection, Refraction, and Alpha Blending
REFRACTION: In order to model refraction in the droplet, we make use of the drop color image. Using the x and y coordinates, we calculate an arbitrary incoming light ray's refraction vector into the water droplet. By flipping this vector, we are able to backtrace the ray to find the background pixel that will be shown at the given pixel. Then, we use alpha blending to create realistic, semi-translucent coloring. For alpha blending, we have a couple different cases:
- If the foreground (raindrop canvas at that point) is transparent (alpha = 0.0), we only return the background RGB values, which means no raindrop is present at that location and no computation is necessary.
- Similarly, if the background (scene) is opaque (alpha = 1.0), add foreground rgb values on top of the background RGB values.
- If neither of these cases are true, we perform regular alpha blending.
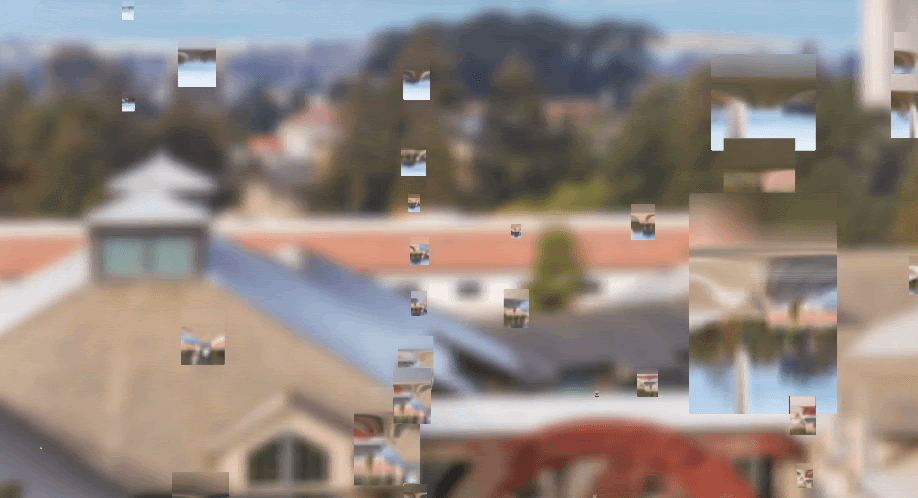
REFLECTION: We compute reflection values by by simply taking the background, scaling it down, flipping it across the y-axis, and applying an alpha transparency value to it. This reflection component gives it a depth effect that makes the image look much more real and 3D.
Finally, we created a variable that connects to our RaindropRenderer, which pipes in a user input from our GUI. This variable controls the mode, and as such, the shader that's applied to the image!
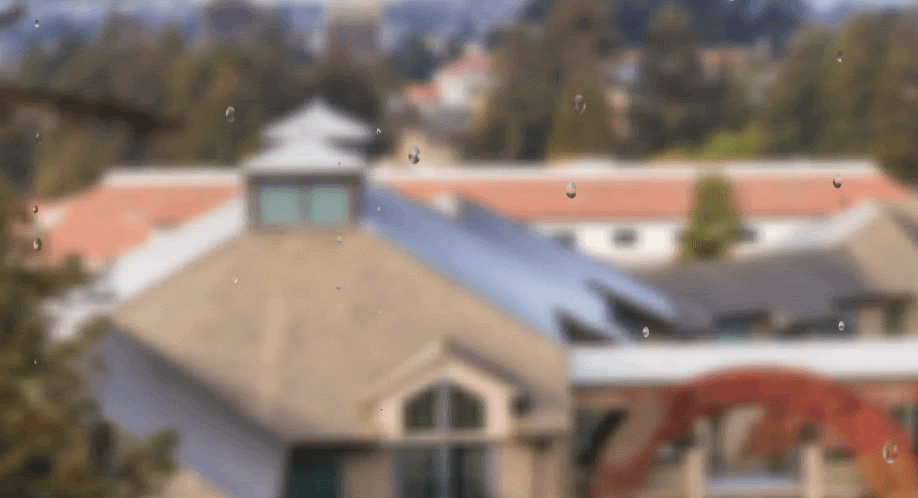
Shaders
We implemented two shaders that built off of our baseline, realistic shader. These shaders were based on a shadertoy project we came across in our research.
The Rainbow Shader
The color augmentation seen here is actually a result of applying a uniform color transformation to the given RGB values. We take in given color values and apply an arbitrary scaling of saturation, hue, and brightness for making finer changes. We then convert our HSV value back into the RGB color space. This is our returned value!
One interesting element to note here is our separation of the foreground and background. When processing the image, a raindrop is present when the foreground has an alpha value > 0.0, since the raindrops are only present in the this foreground canvas. As such, we were able to choose when to apply our filter based on this alpha value. For the rainbow filter, we decided to only apply this shader to our raindrops, which gives it the really interesting effect you see in our demo!
The Spooky Shader
This shader has very similar color processing to the rainbow shader. However, after computing the augmented rgb values, we applied a vectorized filter to the values to convert them into grayscale. We applied this shader to the entire backdrop (both the foreground and the background).
Challenges
One of the challenges we encountered was designing the architecture to track the spawning of new child drops efficiently. As it turns out, we needed to set a parent attribute to the drop in order to ensure that the original drop didn't immediately collide with the newly spawned dot in the collision logic below.
Fine tuning the shrink/spread parameters was tricky - we wrote this logic, and then disabled it until we had built our GUI layer. Then, we used the sliders to determine parameters for shrink and spread that seemed realistic.
Lessons Learned
One of the things that we learned is that for a lot of things in computer graphics, it's possible to get results that are quite realistic without fully modeling the physics behind every single particle in the scene. Our approach to rendering raindrops was very much a hack (we're not independently modeling each water atom + the viscosity between them).
We also learned how to use WebGL and JavaScript for graphics implementations. This included understanding how to debug, format, and integrate new libraries within our HTML/CSS/JS workspace.
Results
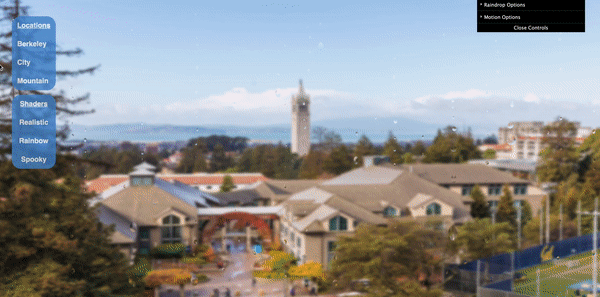
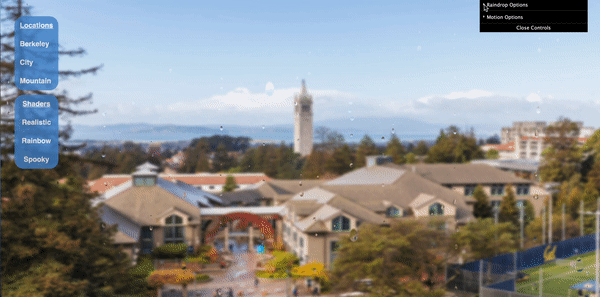
We implemented a GUI to let users control the raindrop architecture, motion, scene background, and fragment shaders. A full project simulation is available here. The following animations show these results:


We also implemented custom menus to change the scene background and the shaders used:
Lastly, we used dat.GUI to let users alter the architecture and motion of the raindrops:

References
Contributions
Shomil: Initial framework setup, raindrop architecture and mathematical motion simulation
Anjali: Wrote the fragment shaders (reflection, refraction, alpha drop + blending)
Niky: Configured background image setup, user interface menus + dat.GUI implementation